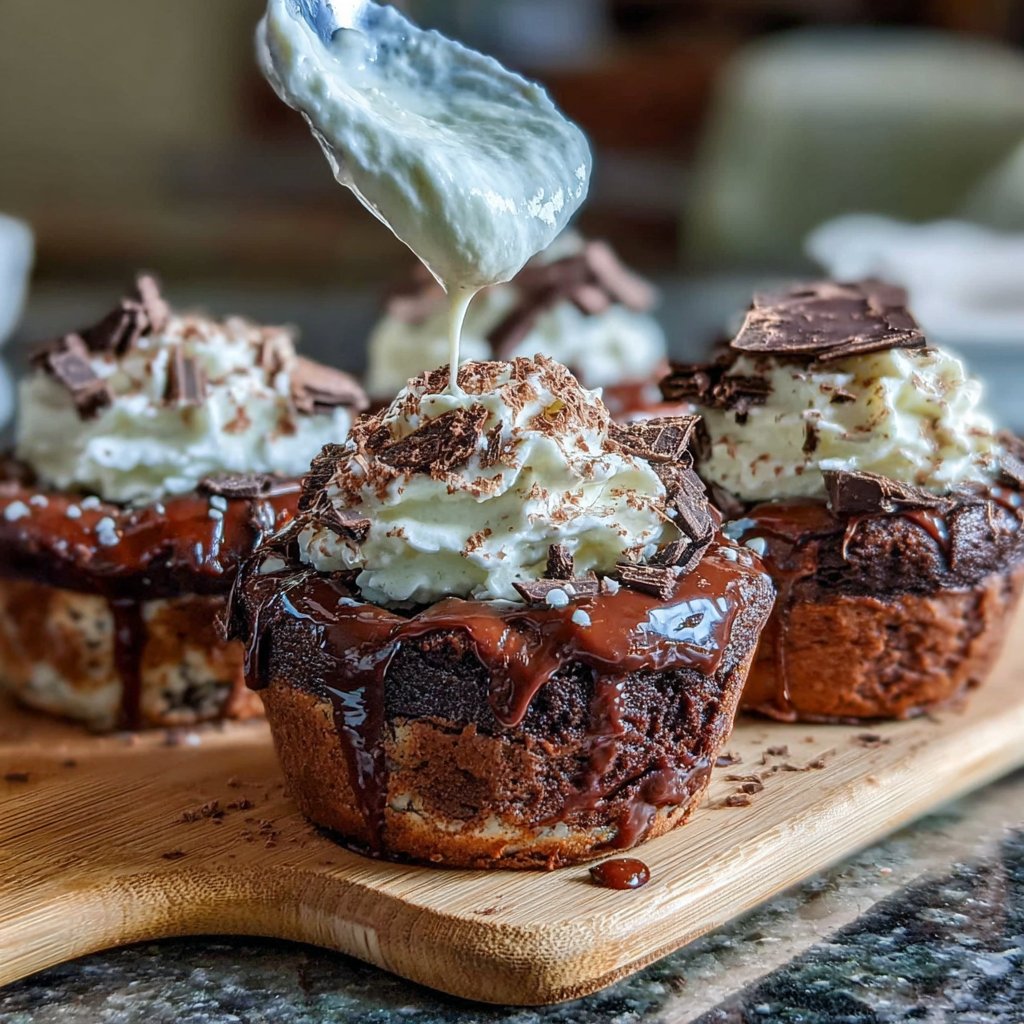
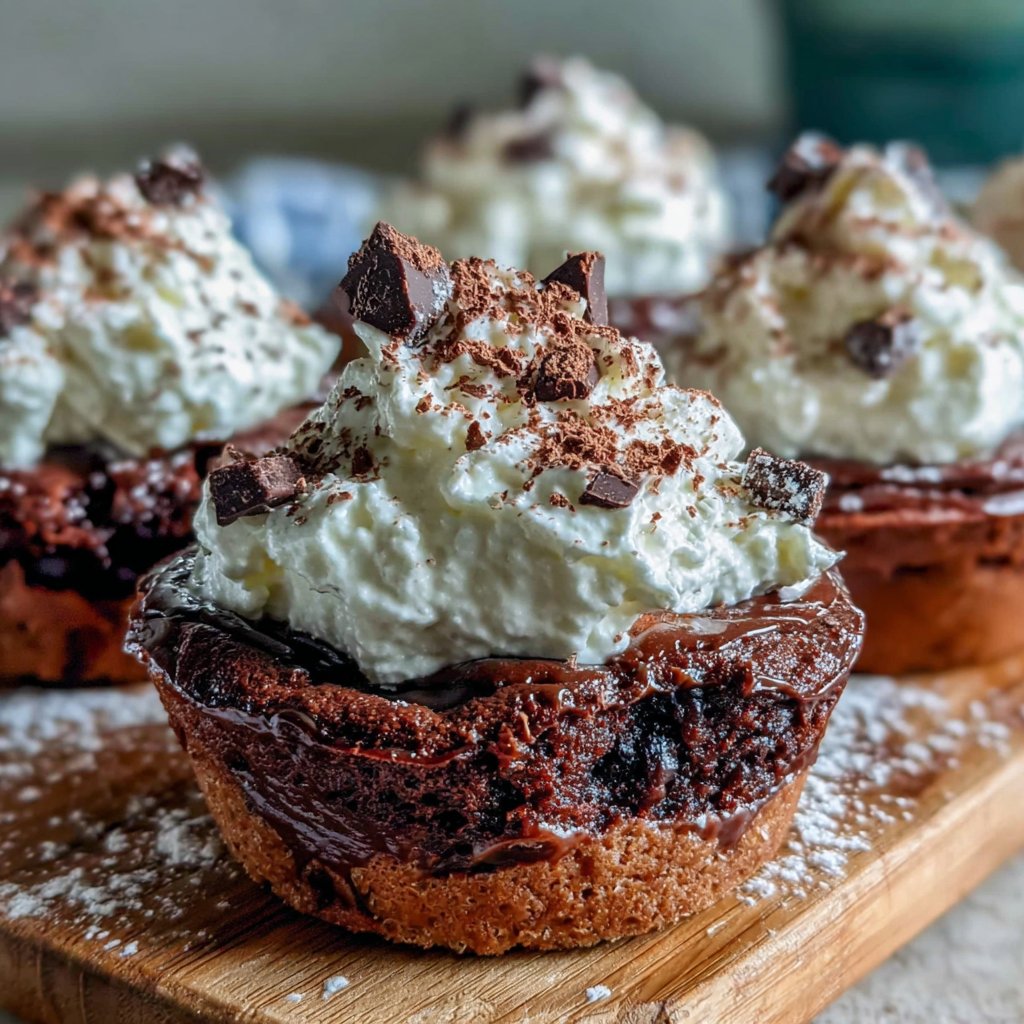
Creamy Chocolate Brownie Cups
Highlighted under: Easy Breakfast
I absolutely love these Creamy Chocolate Brownie Cups! They combine the rich, indulgent flavors of chocolate with a silky smooth filling that elevates any dessert table. The simple yet decadent recipe lets me whip these up in no time, making them perfect for gatherings or a sweet treat after dinner. Each bite is a delightful surprise, and I often find myself reaching for just one more. Trust me; they’ll become your go-to treat for any occasion.
When I first made these Creamy Chocolate Brownie Cups, I was pleasantly surprised by how well the flavors blended together. The brownie base is rich enough to stand alone, but the creaminess of the filling takes it to a whole new level. One tip I’ve learned is to let the brownie cups cool completely before adding the filling, as it helps keep the layers distinct yet harmoniously combined.
After experimenting with different flavor options, I’ve settled on a classic chocolate and vanilla combination for the filling, which perfectly complements the brownie base. To make the process even easier, I recommend using a piping bag for a neat and elegant application of the filling. These little cups are bound to impress!
Why You'll Love This Recipe
- Rich chocolate flavor paired with creamy filling
- Perfect for parties or casual get-togethers
- Easy to make, with minimal ingredients
Perfecting the Brownie Cups
When making the brownie cups, ensure your butter is melted but not boiling, which helps to achieve a smooth batter. Mixing the sugar with melted butter will create a glossy finish, essential for the final texture. Be careful not to overmix the brownie batter once the flour and cocoa powder are added; a few flour streaks remaining will result in a fudgy texture, which is ideal.
Keep an eye on the baking time. Since you’re using a muffin tin, the brownies can bake faster than a traditional pan. Check for doneness at 20 minutes by inserting a toothpick in the center—if it comes out with moist crumbs, they’re perfect. Letting them cool completely allows for easy removal and prevents breakage.
The Art of Whipping Cream
Whipping the heavy cream to stiff peaks is crucial for a light and airy filling. Use chilled equipment—a cold bowl and whisk or beaters—will help the cream whip more efficiently. Be cautious not to overwhip, as it can lead to a grainy texture; just stop when you reach that lovely, firm peak that holds its shape. This lightness contrasts beautifully with the dense brownie base.
When combining the whipped cream with the cream cheese mixture, use a gentle folding technique to maintain volume. This ensures the filling remains fluffy and avoids deflating your hard work. If you prefer, adding a touch of melted chocolate into the filling can deepen the flavor profile and create a richer dessert.
Serving and Storing Your Brownie Cups
These brownie cups are best served chilled, allowing the filling to set slightly and enhancing the creamy texture. They can be prepared a day ahead and stored in the refrigerator, making them a stress-free option for entertaining. If you do opt for make-ahead, cover the brownie cups tightly with plastic wrap to prevent them from absorbing any odors from the fridge.
For a fun presentation, consider drizzling a bit of melted chocolate over the top before serving, or adding a fresh raspberry or cherry for a pop of color. If you find yourself with leftovers, these brownie cups can be stored in the fridge for up to three days—just be sure to keep them airtight to maintain their freshness.
Ingredients
Gather these ingredients to make your Creamy Chocolate Brownie Cups:
For the Brownie Cups
- 1 cup unsalted butter
- 2 cups granulated sugar
- 4 large eggs
- 1 teaspoon vanilla extract
- 1 cup all-purpose flour
- 1 cup unsweetened cocoa powder
- 1/2 teaspoon salt
For the Creamy Filling
- 1 cup heavy cream
- 1 cup cream cheese, softened
- 1 cup powdered sugar
- 1 teaspoon vanilla extract
With these ingredients ready, you’re all set to start creating delicious brownie cups!
Instructions
Follow these steps to create your Creamy Chocolate Brownie Cups:
Prepare the Brownie Batter
Preheat your oven to 350°F (175°C). In a large mixing bowl, melt the butter and mix in the sugar. Add the eggs one at a time, then stir in the vanilla extract. Gradually add the flour, cocoa powder, and salt, mixing until combined.
Bake the Brownies
Grease a muffin tin and pour the brownie batter evenly into each cup, filling them about 2/3 full. Bake for 20-25 minutes or until a toothpick inserted comes out with a few moist crumbs. Let them cool completely.
Make the Creamy Filling
In another bowl, whip the heavy cream to stiff peaks. In a separate bowl, combine the softened cream cheese, powdered sugar, and vanilla extract, mixing until smooth. Gently fold the whipped cream into the cream cheese mixture until well combined.
Fill the Brownie Cups
Once the brownie cups are cool, use a piping bag to carefully fill each cup with the creamy filling. You can sprinkle additional cocoa powder or chocolate shavings on top for decoration.
Enjoy your deliciously rich and creamy brownie cups!
Pro Tips
- For added flavor, consider incorporating espresso powder into the brownie batter or lacing the filling with a hint of orange zest. These variations can elevate your dessert experience.
Ingredient Insights
Understanding the role of each ingredient can elevate your baking game! Unsalted butter is preferred in baking as it allows better control over the saltiness of the dessert. It provides the moisture and richness needed for the brownies while preventing them from becoming too sweet.
Using high-quality cocoa powder is essential for achieving that deep chocolate flavor. Dutch-processed cocoa can provide a smoother chocolate taste and a darker color. For those looking to make this recipe gluten-free, a 1:1 gluten-free flour blend can work well in place of all-purpose flour without compromising texture.
Tips for Variations
Feel free to customize the filling! Substituting mascarpone for cream cheese creates a lighter filling with a subtle tanginess. Or, add a splash of your favorite liqueur, like espresso or Baileys, for an adult twist on this dessert.
You can also include mix-ins in the brownie batter. Chopped nuts or chocolate chips add an extra crunch and gooeyness. Just fold them in gently, ensuring an even distribution without overmixing the batter, to retain the signature fudgy texture.
Cooling and Presentation
Cooling the brownie cups is key; if they aren’t fully cooled, the warm brownies can soften the cream filling, ruining the presentation. Once cooled, you can easily pop them out with a safe edge tool or fork to help loosen them without breaking.
For an extra touch, consider using a piping bag to swirl the creamy filling for an elegant appearance. Topping with a light dusting of cocoa powder or some shaved chocolate creates a beautiful finish that’s eye-catching and irresistible.
Questions About Recipes
→ Can I use a different type of chocolate for this recipe?
Yes, you can use dark or milk chocolate depending on your preference. Just adjust the sweetness of the filling accordingly.
→ How do I store the brownie cups?
Store them in an airtight container in the refrigerator for up to 3 days. They can also be frozen without the filling for later use.
→ Can I make these gluten-free?
Absolutely! Use a gluten-free flour blend instead of all-purpose flour to make the brownies gluten-free.
→ What can I use instead of cream cheese in the filling?
You can substitute cream cheese with mascarpone or Greek yogurt for a different taste and texture.
Creamy Chocolate Brownie Cups
Created by: The Chefconnorfoods Team
Recipe Type: Easy Breakfast
Skill Level: Intermediate
Final Quantity: 12 cups
What You'll Need
For the Brownie Cups
- 1 cup unsalted butter
- 2 cups granulated sugar
- 4 large eggs
- 1 teaspoon vanilla extract
- 1 cup all-purpose flour
- 1 cup unsweetened cocoa powder
- 1/2 teaspoon salt
For the Creamy Filling
- 1 cup heavy cream
- 1 cup cream cheese, softened
- 1 cup powdered sugar
- 1 teaspoon vanilla extract
How-To Steps
Preheat your oven to 350°F (175°C). In a large mixing bowl, melt the butter and mix in the sugar. Add the eggs one at a time, then stir in the vanilla extract. Gradually add the flour, cocoa powder, and salt, mixing until combined.
Grease a muffin tin and pour the brownie batter evenly into each cup, filling them about 2/3 full. Bake for 20-25 minutes or until a toothpick inserted comes out with a few moist crumbs. Let them cool completely.
In another bowl, whip the heavy cream to stiff peaks. In a separate bowl, combine the softened cream cheese, powdered sugar, and vanilla extract, mixing until smooth. Gently fold the whipped cream into the cream cheese mixture until well combined.
Once the brownie cups are cool, use a piping bag to carefully fill each cup with the creamy filling. You can sprinkle additional cocoa powder or chocolate shavings on top for decoration.
Extra Tips
- For added flavor, consider incorporating espresso powder into the brownie batter or lacing the filling with a hint of orange zest. These variations can elevate your dessert experience.
Nutritional Breakdown (Per Serving)
- Calories: 380 kcal
- Total Fat: 26g
- Saturated Fat: 15g
- Cholesterol: 195mg
- Sodium: 85mg
- Total Carbohydrates: 32g
- Dietary Fiber: 3g
- Sugars: 24g
- Protein: 6g